Facebook is an amazingly powerful marketing tool. The platform pulls in an abundance of data on an ongoing basis, and utilizes it to maximize the effectiveness of the advertising being done on their site. Without making us privy to the massive amount of data that they take in on a constant basis, they allow us, as marketers, to make use of it.
One of the ways you can leverage this data, is by creating custom conversions, and optimizing your ads around them.
What are Custom Conversions
Conversions
For starters, a conversion is when your prospect completes a desired behavior, or “converts” on your ad. For instance, a conversion might be that someone clicked your ad and bought your product—pretty simple. But you may have ads that are aimed at different types of conversions—event RSVPs; ebook downloads; discount coupon downloads; etc.
Facebook has the ability to track certain types of common conversions, but for more specific conversions, or for sites that are pushing a number of different ads with different offers (and therefore, conversion points), custom conversions become necessary.
Custom Conversions
A custom conversion is just what it sounds like. It’s a “conversion” that you define for your site, and use on Facebook. If a basic conversion is something like “completed checkout,” you may need a more refined version of that—depending on a specific product or service. So, you could create a custom conversion for anyone who “requests a quote for XYZ service” that you offer. Facebook can then track which type of people are interested in that particular offer.
The reason this is important, is because when you create custom conversions for your specific services or offers, Facebook tracks the type of people who convert on each different service; Facebook then uses that knowledge to help deliver your ads to the best people. If you use a general conversion for all “checkout” traffic, Facebook will track all of those buyers together as a group, without differentiating between your services. This could lead to the wrong offers being served to the wrong customers.
Getting Started with Custom Conversions
Install Facebook Pixel
The first thing that you need to do, before you can set up custom conversions for your site, is to install your Facebook Pixel. The Pixel is a bit of code that helps Facebook track behaviors on your site, and connect them to Facebook users.
Installing the pixel is easy. You can create and copy the pixel code from your Facebook page’s event manager. Here’s an article from Facebook on how to generate and install your pixel on your site.
The process is rather simple. Once you initiate the creation of the pixel, you can add it to your site, or specific site pages, by pasting the code into your web page header.
Build Your Offer
Once your pixel is installed, you’re ready to start creating an offer with a landing page and a thank-you page. It’s important that your landing page redirects to a thank-you page after it has been submitted. We’ll track folks who land on that thank-you page as members of our converting audience—so it’s also important that there is no other way to navigate to your thank-you page without completing your offer, as well!
Once your offer is completed, you can create your custom conversion within Facebook, and let it start populating. It’s important to remember that you won’t be able to use your custom conversion to inform your ads until the conversion has begun populating—in other words, you need a few people to convert on your offer before you can start using the custom conversion in your ads.
Create your Custom Conversion
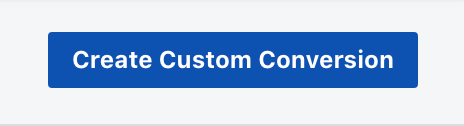
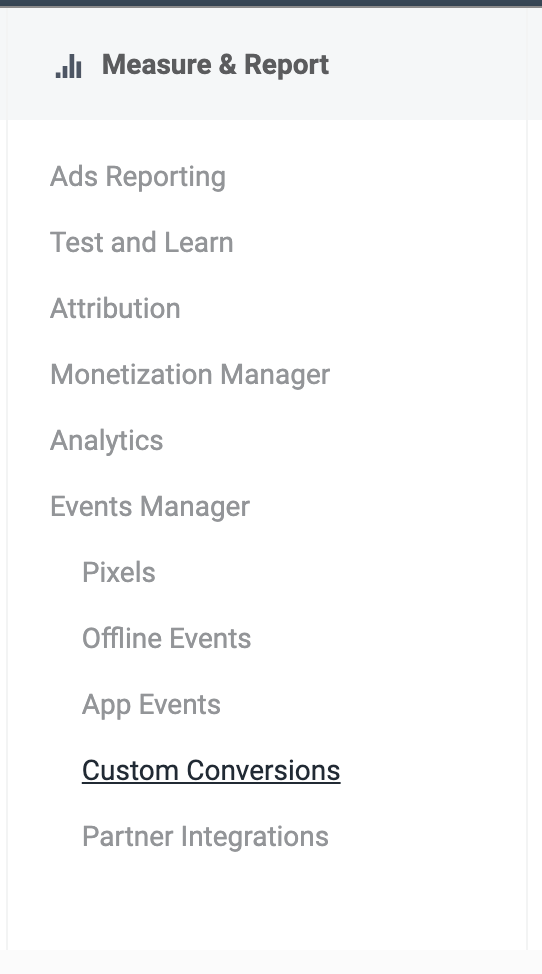
In your Facebook business manager, under Measure and Report, you’ll see Custom Conversions nestled under the Events Manager heading. Click on Custom Conversions, and you’ll be taken to a page of all of your custom conversions, with the option to create a new one listed in the upper right corner. Click Create Custom Conversion to get started.
The new window that appears is where you can choose the URL to base your conversion off of. Using the URL of the thank-you page allows you to track only those people who engaged with and completed your offer.
You have the option to use a complete URL, or to focus on keywords that are contained (or not contained) within your URL. For a single landing page, it’s easiest to paste in the full URL, directly, to avoid any confusion. Select “All URL Traffic” and paste the URL of your landing page into the URL box.
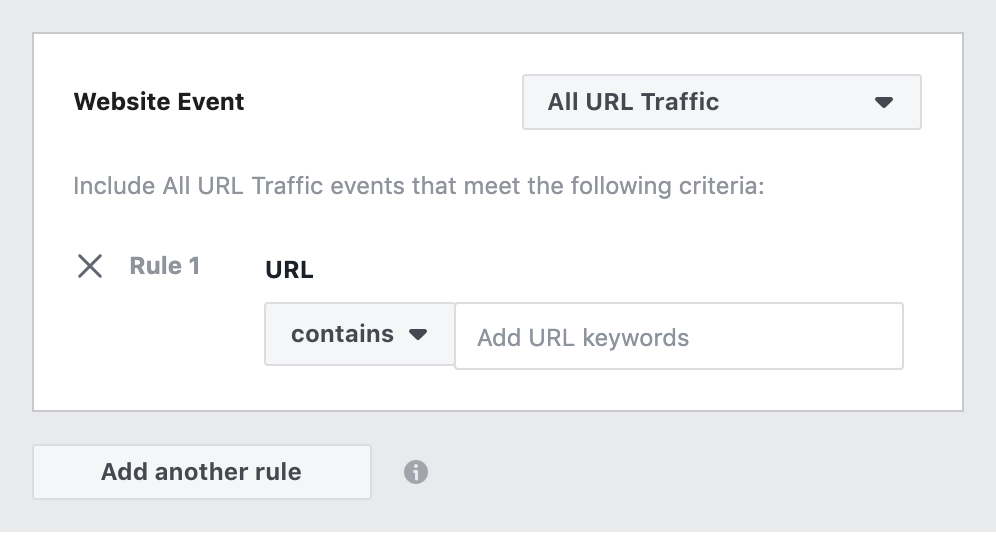
Note: For more complex campaigns and offers, it sometimes makes sense to use the “contains” or “does not contain” logic, so that you can target multiple landing pages.
(This is especially beneficial if you are running split testing with your landing pages—you can create custom conversions that track everyone who has converted on any of the landing pages you are testing and optimize delivery based on that data, while still tracking which landing pages are converting best, overall.)
Help Populate Custom Conversion
As we mentioned above, you can’t utilize your custom conversion until it has been populated with responses (or conversions). There are a number of ways to start populating that conversion, including direct outreach via email or chat, organic posting on social media, or by running paid ads. We can’t create conversion ads using the custom conversion yet, but we can drive traffic to our landing page, for starters. Once you have a few conversions off of your traffic ads, you can switch to more targeted conversion ads, to lower you cost per acquisition.
Utilize Your Custom Conversion
Now that your conversion has been populated with some customer information, you and Facebook can utilize that data to create kick-ass conversion ads. Facebook looks at the ridiculous store of data that it obtains, and uses it to deliver your ads to the best people, in the best ways.
Facebook knows quite a bit about the interests and engagement/buying behaviors of its most active users. It knows how and where to serve ads for different products; it knows who is more likely to buy directly from Facebook, and what style of ads catch their eye most; it knows… a lot. By creating a conversion ad that is built to self-optimize around your particular offer is tremendously powerful.
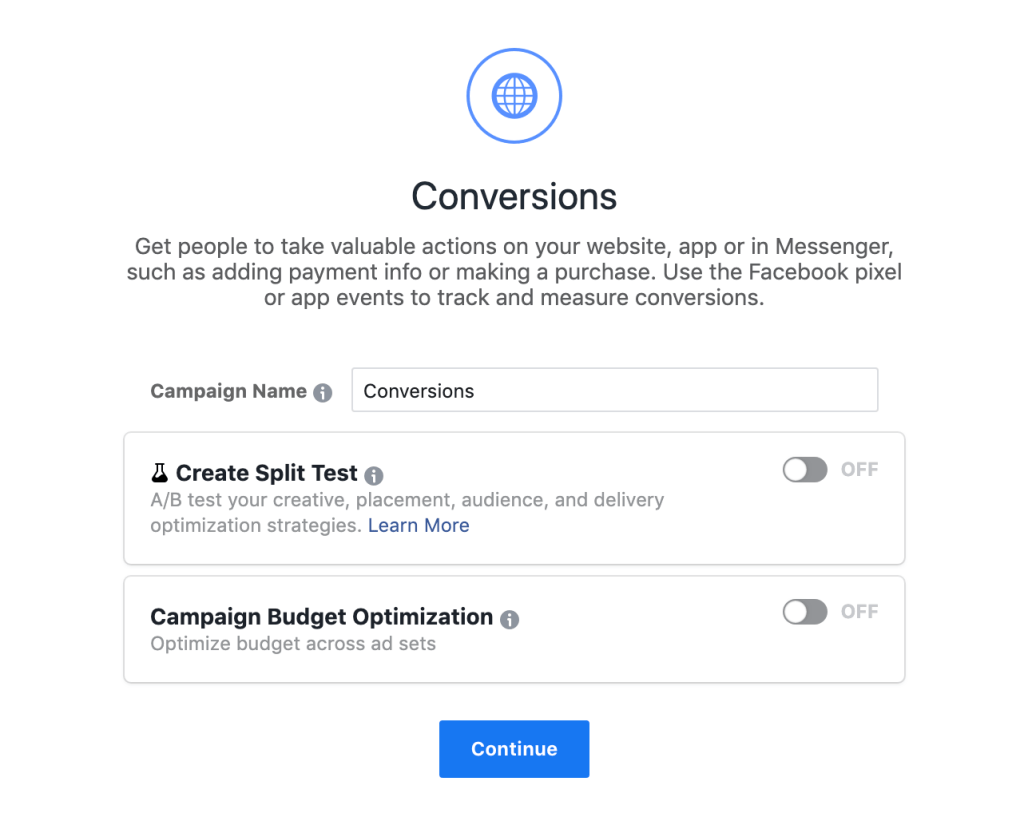
Create a Conversion Ad Campaign
The first step toward utilizing your custom conversion, is to create an ad campaign, and select conversions as your objective.
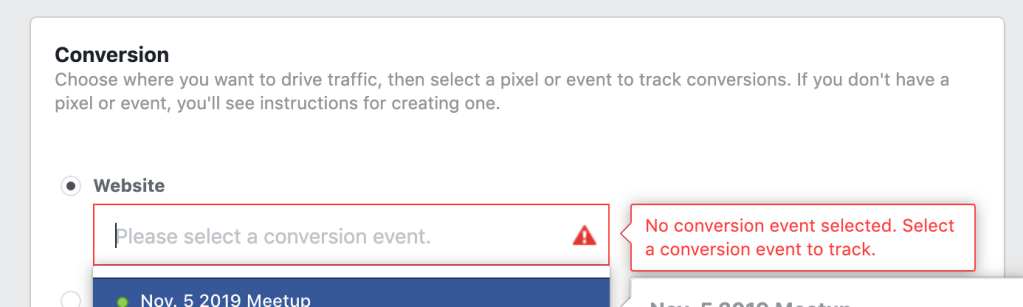
On the next screen, you’ll have the option to select your conversion event. We’ve been using website conversions, so leave the radio select button on Website, and find your custom conversion in the drop down list.
The rest of your campaign creation will be just like any other Facebook ad campaign. Determine your budget, and the time frame to run your ads. Select or create the audience you want to target. Select your creatives. Write some kick-butt copy. And make sure to drive traffic to the correct landing page!
Use Lookalike Audiences
A great way to target these ads, is to create a lookalike audience based off of the folks who have engaged with your products, or the people who have already converted on this offer. Utilize the data that you already have, and allow Facebook to do what it does best—serve advertisements to its users. Simply upload a list of your best prospects, turn them into a custom audience, and then use that custom audience to create a lookalike audience. This is a great way to really make the most of the data that Facebook has to offer!
Conclusion
By setting up landing pages that feed directly to thank you pages, you can easily create custom conversions on Facebook that align with your desired behaviors on your website. Using these custom conversions in your Facebook (and Instagram) advertising, allows Facebook to optimize the delivery of your ads, and drive down your cost per customer acquisition.
If you’re looking for help getting your social media marketing under control, reach out today!

3 thoughts on “Utilizing Custom Conversions for Facebook Ads”